


Forums
IRC Chat
Signatures
Goal Signatures
Calculators

Mini-Game Guides
Miscellaneous Guides
Guild Guides
Treasure Trails
Agility
Combat
Achievement Diaries
Construction
Cooking
Crafting
Farming
Firemaking
Fishing
Fletching
Herblore
Hunter
Magic
Mining
Prayer
Ranging
Runecrafting
Slayer
Smithing
Summoning
Thieving
Woodcutting


TzHaar Fight Cave

By: Mysticallity, pictures by Makoto and Urahoe
(This is a members-only feature.)
Overview
Recommendations
Monsters
Attacking
TzTok-Jad
Rewards
Note: This is a 'safe' Mini-Game. If you die, you will not lose your items.
Location: TzHaar City, near the bank
Due to a silent update on the 26th of June 2007, all monsters will walk diagonally towards you now. This makes the safe spot useless in trapping all the monsters and changes the way you should fight against TzTok-Jad. You will have to fight against all monsters in a wave at the same time.
The TzHaar Fight Cave is a combat intensive mini-game which requires you to fight against monsters without stopping in-between. At the end, you will have to defeat a boss before you can complete this mini-game. You will need to use certain strategies for certain situations, or else you will find youself dying very quickly.
Game Overview
The concept of this mini-game is simple. When you enter the Fight Cave, you will have to fight against a wave of enemies. When you have cleared a wave of enemies, the next wave of enemies will appear. This will go on for about two hours, with each wave getting progressively harder. You will not be able to restock during the minigame, so you should have everything you need before you start. You will only be allowed to leave if you have finished the entire mini-game or if you decided to quit.
There are several ways to quit from your current game. If you do so, you will have to start from the first wave if you ever want to play this mini-game again.
Note: Any runes or arrows that are used/not picked up during the mini-game will not be returned.
- If you die within the Fight Cave, you will appear in TzHaar City with all of your items intact. You will also receive Tokkul for your efforts. Note: If you die within TzHaar City, you will lose your items. Please be aware of the difference.
- There is a cave entrance in the north-east of the Fight Cave, which you came through at the start of the mini-game. You can go through this entrance to return to TzHaar City anytime you wish. You will retain all of your items and be rewarded with Tokkuls for your efforts.
- If you teleport your character to anywhere else during the mini-game, then you will be allowed to do so. You will retain all of your items, but you will not receive any Tokkul.
- If you are disconnected, or if you log out (in a certain way; explained later), then you will appear in TzHaar City when you log in next time. You will retain all of your items, but you will not receive any Tokkuls.
There is a way to save your progress in the Fight Cave. All you have to do is to click on log out once. You will not log out, but your request will be received. Once you have finished your current wave, you will automatically log out. Your next wave will start when you log in next time.
If you are using Melee, then you may encounter problems when logging out. This is because the game does not allow you to log out when you are in combat. You should attempt to log out when you are not in combat (no health bar present above your character's head) and finish your current wave without being in combat at the end. This can be done by attacking the remaining monsters from a distance. You will log out automatically as soon as you have killed your last enemy in your current wave.
If you return to the Fight Cave by logging in, then you will start on your next wave in the middle of the cave. This is particularly dangerous if your next wave involves long-range monsters. It is generally better to play through the whole mini-game without taking a break to prevent any chances of losing your progress and being disadvantaged on your next wave.
Note: You should never try to log out twice in a wave. If you do, you will appear in TzHaar City when you log in next time and you will not receive any Tokkuls.
Make sure you have Auto Retaliate off before you start this mini-game.
Recommendations
The following stats and equipments are highly recommended. You don't NEED them to play, but please note that with anything much less you probably won't be able to win.
Stats
Level 80 Attack
Level 80 Strength
Level 70 Defence
Level 70 Ranged (recommended)
Level 43 Prayer
Level 50 Agility (recommended)
Outfit
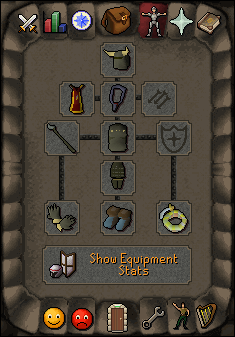
Specifics
Item | Sta | Sla | Cru | Mag | Ran | Sta | Sla | Cru | Mag | Ran | Str | Pra | |
 | Guthan's helm | - | - | - | -6 | -2 | +55 | +58 | +54 | -1 | +62 | - | - |
 | Guthan's platebody | - | - | - | -30 | -10 | +122 | +120 | +107 | -6 | +132 | - | - |
 | Guthan's chainskirt | - | - | - | -14 | -7 | +75 | +72 | +73 | -4 | +82 | - | - |
 | Guthan's warspear | +75 | +75 | +75 | - | - | +7 | +7 | +7 | - | - | +75 | - |
 | Attack cape(t) | - | - | - | - | - | +9 | +9 | +9 | +9 | +9 | - | +4 |
 | Amulet of fury | +10 | +10 | +10 | +10 | +10 | +15 | +15 | +15 | +15 | +15 | +8 | +5 |
 | Gloves | +12 | +12 | +12 | +6 | +12 | +12 | +12 | +12 | +6 | +12 | +12 | - |
 | Rune boots | - | - | - | -3 | -1 | +12 | +13 | +14 | - | - | +2 | - |
 | Warrior ring | - | +4 | - | - | - | - | +4 | - | - | - | - | - |
- If you do not have a trimmed skill cape, you should either look for an untrimmed one or an Obsidian cape.
- If you do not have an Amulet of fury, you can replace it with an Amulet of glory.
- If you cannot get at least a pair of rune Gloves, then look for a pair of gauntlets.
- If you cannot afford a pair of Adamant boots or Rune boots, you should have Climbing boots at the very least.
And, in all, if you can't get the above items or anything better, get the best you can.
Inventory
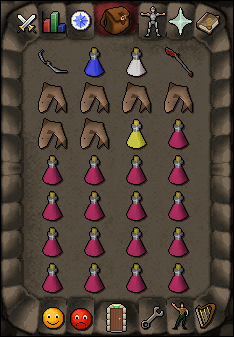
Specifics
Note: The effects of potions are dependent on your stats.
Item | Uses | |
 | Crystal bow full | Used in certain situations |
 | Dragon halberd | Used in certain situations |
 | Super attack(4) | 5-19 Attack boost |
 | Super strength(4) | 5-19 Strength boost |
 | Saradomin brew(4) | 2-16 Hitpoints boost, 2-21 Defence boost, 2-9 Strength loss, 2-9 Attack loss, 2-9 Magic loss, 2-9 Ranged loss |
 | Super restore(4) | 8-32 restoration on all stats except Hitpoints |
 | Shark | Heals 20 Hitpoints |
- If you cannot acquire or use a Crystal bow, then bring the best bow and around 100 of the best arrows you can use. If your Ranged is low, you're better off with some supplies instead.
- You can replace Super restores with Prayer potions if they restore more prayer.
- If you think you won't take too much damage, you can replace some food for potions, and vice versa. You should have at least 17 prayer-restoring potions.
Monsters
Tz-Kih (level-22)

Tz-Kihs will drain your current Prayer by 1 for each melee attack they execute (regardless of whether it damages you or not). You should kill any Tz-Kihs you can see before you move onto other monsters.
Wave 1 - 22
Wave 2 - 22, 22
Tz-Kek (level-45)

Tz-Keks will deal 1 damage (exclusive to its usual melee attacks) to you for every damaging Melee attack you do to them. If you're maging or ranging, you won't take the recoil damage. When one Tz-Kek dies, two Tz-Keks (22) will appear. It is best to leave Tz-Keks to the last.
Wave 3 - 45
Wave 4 - 45, 22
Wave 5 - 45, 22, 22
Wave 6 - 45, 45
Tz-Kek (level-22)
Note: This monster is not included in the list of waves.

The Tz-Keks (22) are the second form of Tz-Keks (45). They are like Tz-Kihs, but they do not drain your Prayer.
Tok-Xil (level-90)
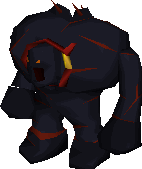
Tok-Xils will be one of your worst enemies as their range attacks can hit up to 13 quite frequently. They can switch to melee attacks if you're close enough, but they can still use range attacks instead. You should kill Tok-Xils next if there are no Tz-Kihs on sight or if there are no more Tz-Kihs left in your current wave.
Wave 7 - 90
Wave 8 - 90, 22
Wave 9 - 90, 22, 22
Wave 10 - 90, 45
Wave 11 - 90, 45, 22
Wave 12 - 90, 45, 22, 22
Wave 13 - 90, 45, 45
Wave 14 - 90, 90
Yt-MejKots (level-108)
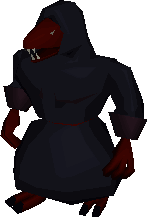
Yt-MejKots are slow but they can hit up to 25 with their melee attacks. They can heal other creatures or themselves when they're damaged, but only if they are in combat with you. Try to avoid direct combat with them, as they can hit quite accurately.
Wave 15 - 180
Wave 16 - 180, 22
Wave 17 - 180, 22, 22
Wave 18 - 180, 45
Wave 19 - 180, 45, 22
Wave 20 - 180, 45, 22, 22
Wave 21 - 180, 45, 45
Wave 22 - 180, 90
Wave 23 - 180, 90, 22
Wave 24 - 180, 90, 22, 22
Wave 25 - 180, 90, 45
Wave 26 - 180, 90, 45, 22
Wave 27 - 180, 90, 45, 22, 22
Wave 28 - 180, 90, 45, 45
Wave 29 - 180, 90, 90
Wave 30 - 180, 180
Ket-Zek (level-360)
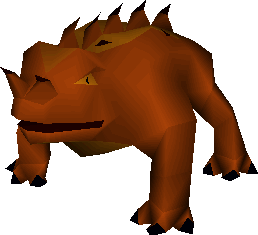
Ket-Zek can hit up to 49 with their magic or melee (if you are close enough) attacks. They have a further attack range than Tok-Xils so you should have Protect from Magic on when you have them in your waves.
Wave 31 - 360
Wave 32 - 360, 22
Wave 33 - 360, 22, 22
Wave 34 - 360, 45
Wave 35 - 360, 45, 22
Wave 36 - 360, 45, 22, 22
Wave 37 - 360, 45, 45
Wave 38 - 360, 90
Wave 39 - 360, 90, 22
Wave 40 - 360, 90, 22, 22
Wave 41 - 360, 90, 45
Wave 42 - 360, 90, 45, 22
Wave 43 - 360, 90, 45, 22, 22
Wave 44 - 360, 90, 45, 45
Wave 45 - 360, 90, 90
Wave 46 - 360, 180
Wave 47 - 360, 180, 22
Wave 48 - 360, 180, 22, 22
Wave 49 - 360, 180, 45
Wave 50 - 360, 180, 45, 22
Wave 51 - 360, 180, 45, 22, 22
Wave 52 - 360, 180, 45, 45
Wave 53 - 360, 180, 90
Wave 54 - 360, 180, 90, 22
Wave 55 - 360, 180, 90, 22, 22
Wave 56 - 360, 180, 90, 45
Wave 57 - 360, 180, 90, 45, 22
Wave 58 - 360, 180, 90, 45, 22, 22
Wave 59 - 360, 180, 90, 45, 45
Wave 60 - 360, 180, 90, 90
Wave 61 - 360, 180, 180
Wave 62 - 360, 360
Attacking
There are certain positions you can stand in the fight cave where you can kill more easily than if you were running everywhere trying to find and kill your enemies.
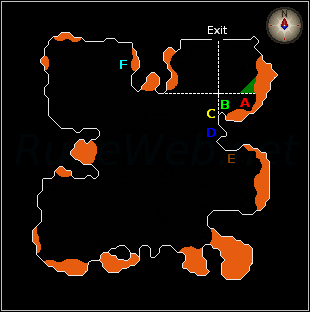
Monsters will align horizontally with you before doing so vertically. If you're standing in the green area (located in the north-west), then all of the monsters will either be stuck at point E or point F. Tz-Kihs can fly towards you diagonally though, so keep an eye out for them.
Waves 1-6: You can stand at point D, as close to the wall as possible, and attack from there. This is because Tz-Keks are large enemies and will be trapped at the north or south point of the wall. Tz-Kihs are the only ones you have to worry about, as they can fly towards you.
If you see any Tz-Kihs, switch to your Crystal bow (if you don't have a bow, use your Dragon halberd instead) to try and kill them before they can reach you. If they do reach you, switch to Guthan's spear and kill them as fast as possible.
For Tz-Keks, if you are low on health, equip your Guthan's Spear and attack both forms with them. If not, use your Dragon halberd on the first form, then Guthan's spear on the second form. On wave 6, try to leave one of the Tz-Keks (22) alive back to your safe spot before killing it. This should be done in the later waves.
Wave 7-14: At the start of wave 7, you should be at your safe spot. You'll need to wait for a while (around 20 seconds) for your enemies to settle at point E. When you have waited for a while, run towards point A and see if Tok-Xil is at the other end by using your mini-map by right-clicking on the other side. If so, you can prepare yourself and move out. If not, you might want to hurry back to your safe spot and wait for a few more moments.
For Tok-Xils, use your specials on your Dragon halberd, then switch to Guthan's spear. If you are low on health (which you shouldn't be), you can turn on Protect from Missiles and use Guthan's spear directly.
If the Tz-Kihs are near enough to attack you before you reach the Tok-Xils, kill the Tz-Kihs first.
Wave 15-21: Once again, you can stand at point D (stand close to the wall) and let the monsters come to you. Tz-Keks and Yt-MejKots will be stuck at the north or south point of the wall. Keep on the lookout for any Tz-Kihs.
For Yt-MejKots, you should trap it first, then kill it with your Dragon Halberd. If you are low on hitpoints and you are using Guthans, you can equip your Guthan's Spear, turn Protect from Melee on, then attack Yt-MejKot until it's dead. Don't do it for too long though, you'll need to conserve prayer for the later waves.
At the end of wave 21, you should be in your safe spot for wave 22.
Wave 22-30: This is where things get a bit trickier. You should wait at the safe spot as normal. If you find the Yt-MejKot standing in front of Tok-Xils, you can use your Crystal bow (or a normal bow) to kill it. You may turn on Protect from Missiles if you're low on health. If you do not have the means to attack from a distance, you'll need to run around to pass through Yt-MejKot (or you can turn Protect from Melee on and run past it), then go behind the Tok-Xils. The Yt-MejKot should be trapped behind the Tok-Xils. You can dispatch the Tok-Xils, turn Protect from Melee on, trap the Yt-MejKot against the northern or southern point of the rock, then kill it.
On wave 30, you should lure the last Yt-MejKot to your safe spot, turn Protect from Melee on, then kill it.
Wave 31-37: From now on, at the start of the following waves, you should be at your safe spot and you should have your prayer menu up. You will have to wait for a while to let your enemies move towards point E. From now on, you may drink a dose of Super attack and Super strength. Your Super restores will not affect your boosted stats so keep using them when necessary. You should only drink another dose of the two potions when your Attack and Strength are back to their base levels.
After around 20 seconds, you can turn on Protect from Magic, move to point A and see what monsters you'll have to face.
If you see a yellow dot on your mini-map walking through point C at any point in your safe spot, turn on Protect from Magic immediately. If it is a Kek-Zek, move to point A (as close to the lava as possible). This should trap any enemies coming from point F. You can then move to point B, which is one square away from the Ket-Zek, and attack using the Dragon halberd.
For Ket-Zeks, do NOT engage in a direct combat with them! Use your Dragon halberd to attack them instead, keeping Protect from Magic on at all times. Always make sure you are at least one square away from the Ket-Zek.
Wave 38-61: If you are in your safe spot at the start of wave 38, then you should be safe. If not, turn Protect from Magic on and run towards your safe spot. You do not want to be dealing with magic and range attacks at the same time. Even if you are in your safe spot, you should be on the lookout for any monsters walking through point C and turn Protect from Magic on, then run towards point A, just in case it is a Ket-Zek. If it's a Tok-Xil, turn Protect from Magic on and move towards point A. Look for any Ket-Zeks walking behind the Tok-Xil. If there aren't any or if they can't reach you with their attacks, turn on Protect from Missiles and continue.
When you have waited in your safe spot for 20 seconds or so, turn Protect from Magic on and move towards point A. Right-click within the southern part of the rock to look for any Tok-Xils or Ket-Zeks then plan accordingly.
Before you finish wave 61, make sure you keep Protect from Magic on.
Wave 62: In this wave, you do not have to be in your safe spot as long as you have Protect from Magic on. Just seek out the Ket-Zeks and kill them. For the last Ket-Zek, lure it back to your safe spot before killing it.
Situations
Sometimes you might find yourself in a difficult situation, such as being attacked by a Tok-Xil and a Ket-Zek at the same time. This occurs in waves 38-45 and 53-60.
If you find yourself being attacked by flames from the west when you run towards point A, then you'll have to deal with a Ket-Zek. You have to move towards point F so that you'll relocate the Ket-Zek and everyone at point E within your range whilst keeping Protect from Magic on. From here, wield your Crystal bow (or your bow and arrows) and start shooting at the Tok-Xils. When they are gone, you can use your Dragon halberd and attack Ket-Zek.
If you do not have any means of attacking beyond Ket-Zek's reach, you'll have to rely on your Guthan's spear. Run around Ket-Zek to avoid its melee attack. Go behind Tok-Xil so that the other monsters are trapped behind it. Your priority should be to trap the Yt-MejKot. Once they are trapped, you can kill any Tz-Kihs or Tz-Keks around you, then move onto the Tok-Xils. Once they're gone, you can deal with the Ket-Zek.
If you find yourself attacked by spikes instead when you run towards point D, then you'll have to deal with Tok-Xils. Keep Protect from Magic on and run towards point C. You can now kill the Tok-Xils. If you find a second one being trapped behind a Ket-Zek, use the strategy above to deal with it.
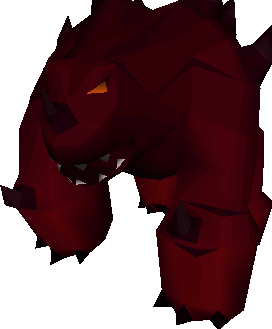
TzTok-Jad (level-702)
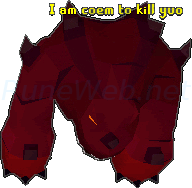
When wave 63 starts, your character will automatically move towards the center. Make sure you stop your character from doing so and keep it at your safe spot. You should keep your prayer menu up just in case TzTok-Jad moves through point C. At this point, you should drink all the necessary potions and wield your Dragon halberd. You should wait at your safe spot for about a minute.
If TzTok-Jad has managed to reach you, turn on Protect from Missiles immediately and start the battle.
If you have waited for a while and TzTok-Jad has not reached you by then, turn on Protect from Missiles and run towards point A. If you see a yellow dot on point E, then it's there. If not, run towards point E immediately, so it will move from point F to point D.
TzTok-Jad uses all three types of attack (Magic, Range, Melee), all able to hit up to 97. Fortunately, like Ket-Zeks, it will not use its melee attack if you attack it from a distance. The difference between TzTok-Jad and the other monsters is that its attacks has a delayed animation before the attack is executed (except for melee, which is a headbutt). You will then be able to know which attack is coming up and you can activate the corresponding protection prayer. The way to predict its attacks is to watch its front legs.
Magic attack: It will lift its front legs into the air and hold this stance for two seconds. At around the third second, it will shoot a fireball at you. To avoid getting damaged, you must turn Protect from Magic on while it is holding its front legs up.
Range attack: It will lift his front legs very high (much higher than his magic attack) and stomp it down quickly (with some circular red shockwave comming from its front legs). A piece of rock (about two seconds later) will fall from the ceiling and drop onto you. Turn Protect from Missiles on when it stomps its legs.
Be careful though. If you want to drink any potions, do it when TzTok-Jad is getting ready to execute an attack and you have the correct Protection Prayer on. If you drink when TzTok-Jad has already prepared an attack you aren't protected from, any requests to change your Prayer is denied for a few seconds (since it takes about a fraction of a second for the server to register the change and the fact that you can't change your prayers when you are completing an action), which might be enough to finish you off.
Yt-HurKot (level-108)

When TzTok-Jad is at half of its health, four Yt-HurKots (miniature Yt-MejKots) will appear and start to heal TzTok-Jad. You will have to lure them out of TzTok-Jad's range so you can kill them. Depending on the position of TzTok-Jad, you have several options to do this.
Point E: Use your Crystal bow (or bow and arrows) to shoot at the Yt-HurKots. You'll only need to shoot at each of them once to make them attack you instead. Keep watching TzTok-Jad's attack and pray accordingly. Your priority is to keep yourself alive. Don't worry if the Yt-HurKots manages to heal most of TzTok-Jad's health. When you have all the Yt-HurKots onto you, run towards point A. They should follow you and TzTok-Jad will be stuck at point E, unable to attack you. You can now switch to Protect from Melee and use your Guthan's spear to kill the Yt-HurKots. When they're all gone, you can resume your fight with TzTok-Jad.
Point A: The strategy is the same as above. The only different is TzTok-Jad being located at point A and Yt-HurKots being lured to point E.
Point C: This happens if TzTok-Jad manages to reach you when you were waiting in your safe spot. You should keep attacking and protecting from TzTok-Jad until all the Yt-HurKots have reached TzTok-Jad. Wield your Crystal bow (or bow and arrows) and start shooting the Yt-HurKots located to the south of TzTok-Jad. You'll need to leave one of the Yt-HurKot closest to you (which should be one of the western ones). It will stop the other Yt-HurKots from moving towards you unless you are standing a horizontal square away from that particular Yt-HurKot. When you have successfully lured most of the Yt-HurKots, move towards point A/B and shoot at the last Yt-HurKot. All the Yt-HurKots should be trapped and not healing TzTok-Jad. Now you can resume your battle with TzTok-Jad.
If you have no means of attacking from a distance, this will be harder for you. You will need to use your Dragon halberd, but that means you will be open to TzTok-Jad's melee attacks.
When you are close to TzTok-Jad, you should have Protect from Melee on at all times if TzTok-Jad isn't preparing for any other attacks. If it performs a headbutt, you'll be fine. When you see it raising its legs, turn on the corresponding protection prayer immediately. When you have been hit, turn Protect from Melee on and repeat the process.
In the process, you'll need to stand to the west of the western Yt-MejKot, located at the south of TzTok-Jad. Use your Dragon halberd to attack both southern Yt-MejKots. Make sure you're exactly aligned with the western Yt-MejKots when you're doing this. When both southern Yt-MejKots are onto you, move north whilst keeping yourself aligned with the western Yt-MejKots. You should go straight past them and the southern Yt-MejKots will be trapped against the southern one of the western Yt-MejKots. You should now attack the southern one of the western Yt-MejKots, then attack the western Yt-MejKot nearest to you when you have moved in front of it. Now you'll need to run back to point A and you should only have one Yt-MejKot following you. The others should be trapped against TzTok-Jad. You can now dispose of the lone Yt-MejKot and resume your battle against TzTok-Jad.
Remember, you will need to do all of that whilst switching to the right prayer.
If you've messed it up and end up luring all the Yt-MejKots to point A, you can make a daring run towards point D whilst TzTok-Jad is preparing for an attack. If you're running through when TzTok-Jad isn't preparing for an attack, turn on Protect from Melee. If you see it preparing for the other attacks, switch to the corresponding prayer immediately.
When you have reached point D, all the Yt-MejKots should be trapped north of TzTok-Jad. You can now resume your battle with TzTok-Jad.
Wave 63 - 702, ∞108
Rewards
For completing the Fight Cave, you will get a Fire cape.
Item | Sta | Sla | Cru | Mag | Ran | Sta | Sla | Cru | Mag | Ran | Str | Pra | |
 | Fire cape | +1 | +1 | +1 | +1 | +1 | +11 | +11 | +11 | +11 | +11 | +4 | +2 |
If you lose it, you will have to defeat TzTok-Jad to get another one so try to be careful when you're wearing it. It gives an animation of flowing lava on the surface of the cape.
You will also get 8,032 Tokkul along with your Fire Cape. If you already have one, you would only get 16,032 Tokkul next time you complete the Fight Cave.
That's as much as we can offer on the Fight Caves. Keep practicing, and watch yourself!
 Back to Top
